Table of Contents
This sketch is mostly a hardware improvement based on my first attempt to make a cheep and easy to use lap timer for gokarts; arduino laptimer v1
The main problem with the first version of this lap timer is that it is too heavy and too bulky. A go kart makes a lot of vibrations, even with powerfull magnets it is troublesome to mount the display on the steeringwheel - also the battery had to be mounted on the steeringwheel too.
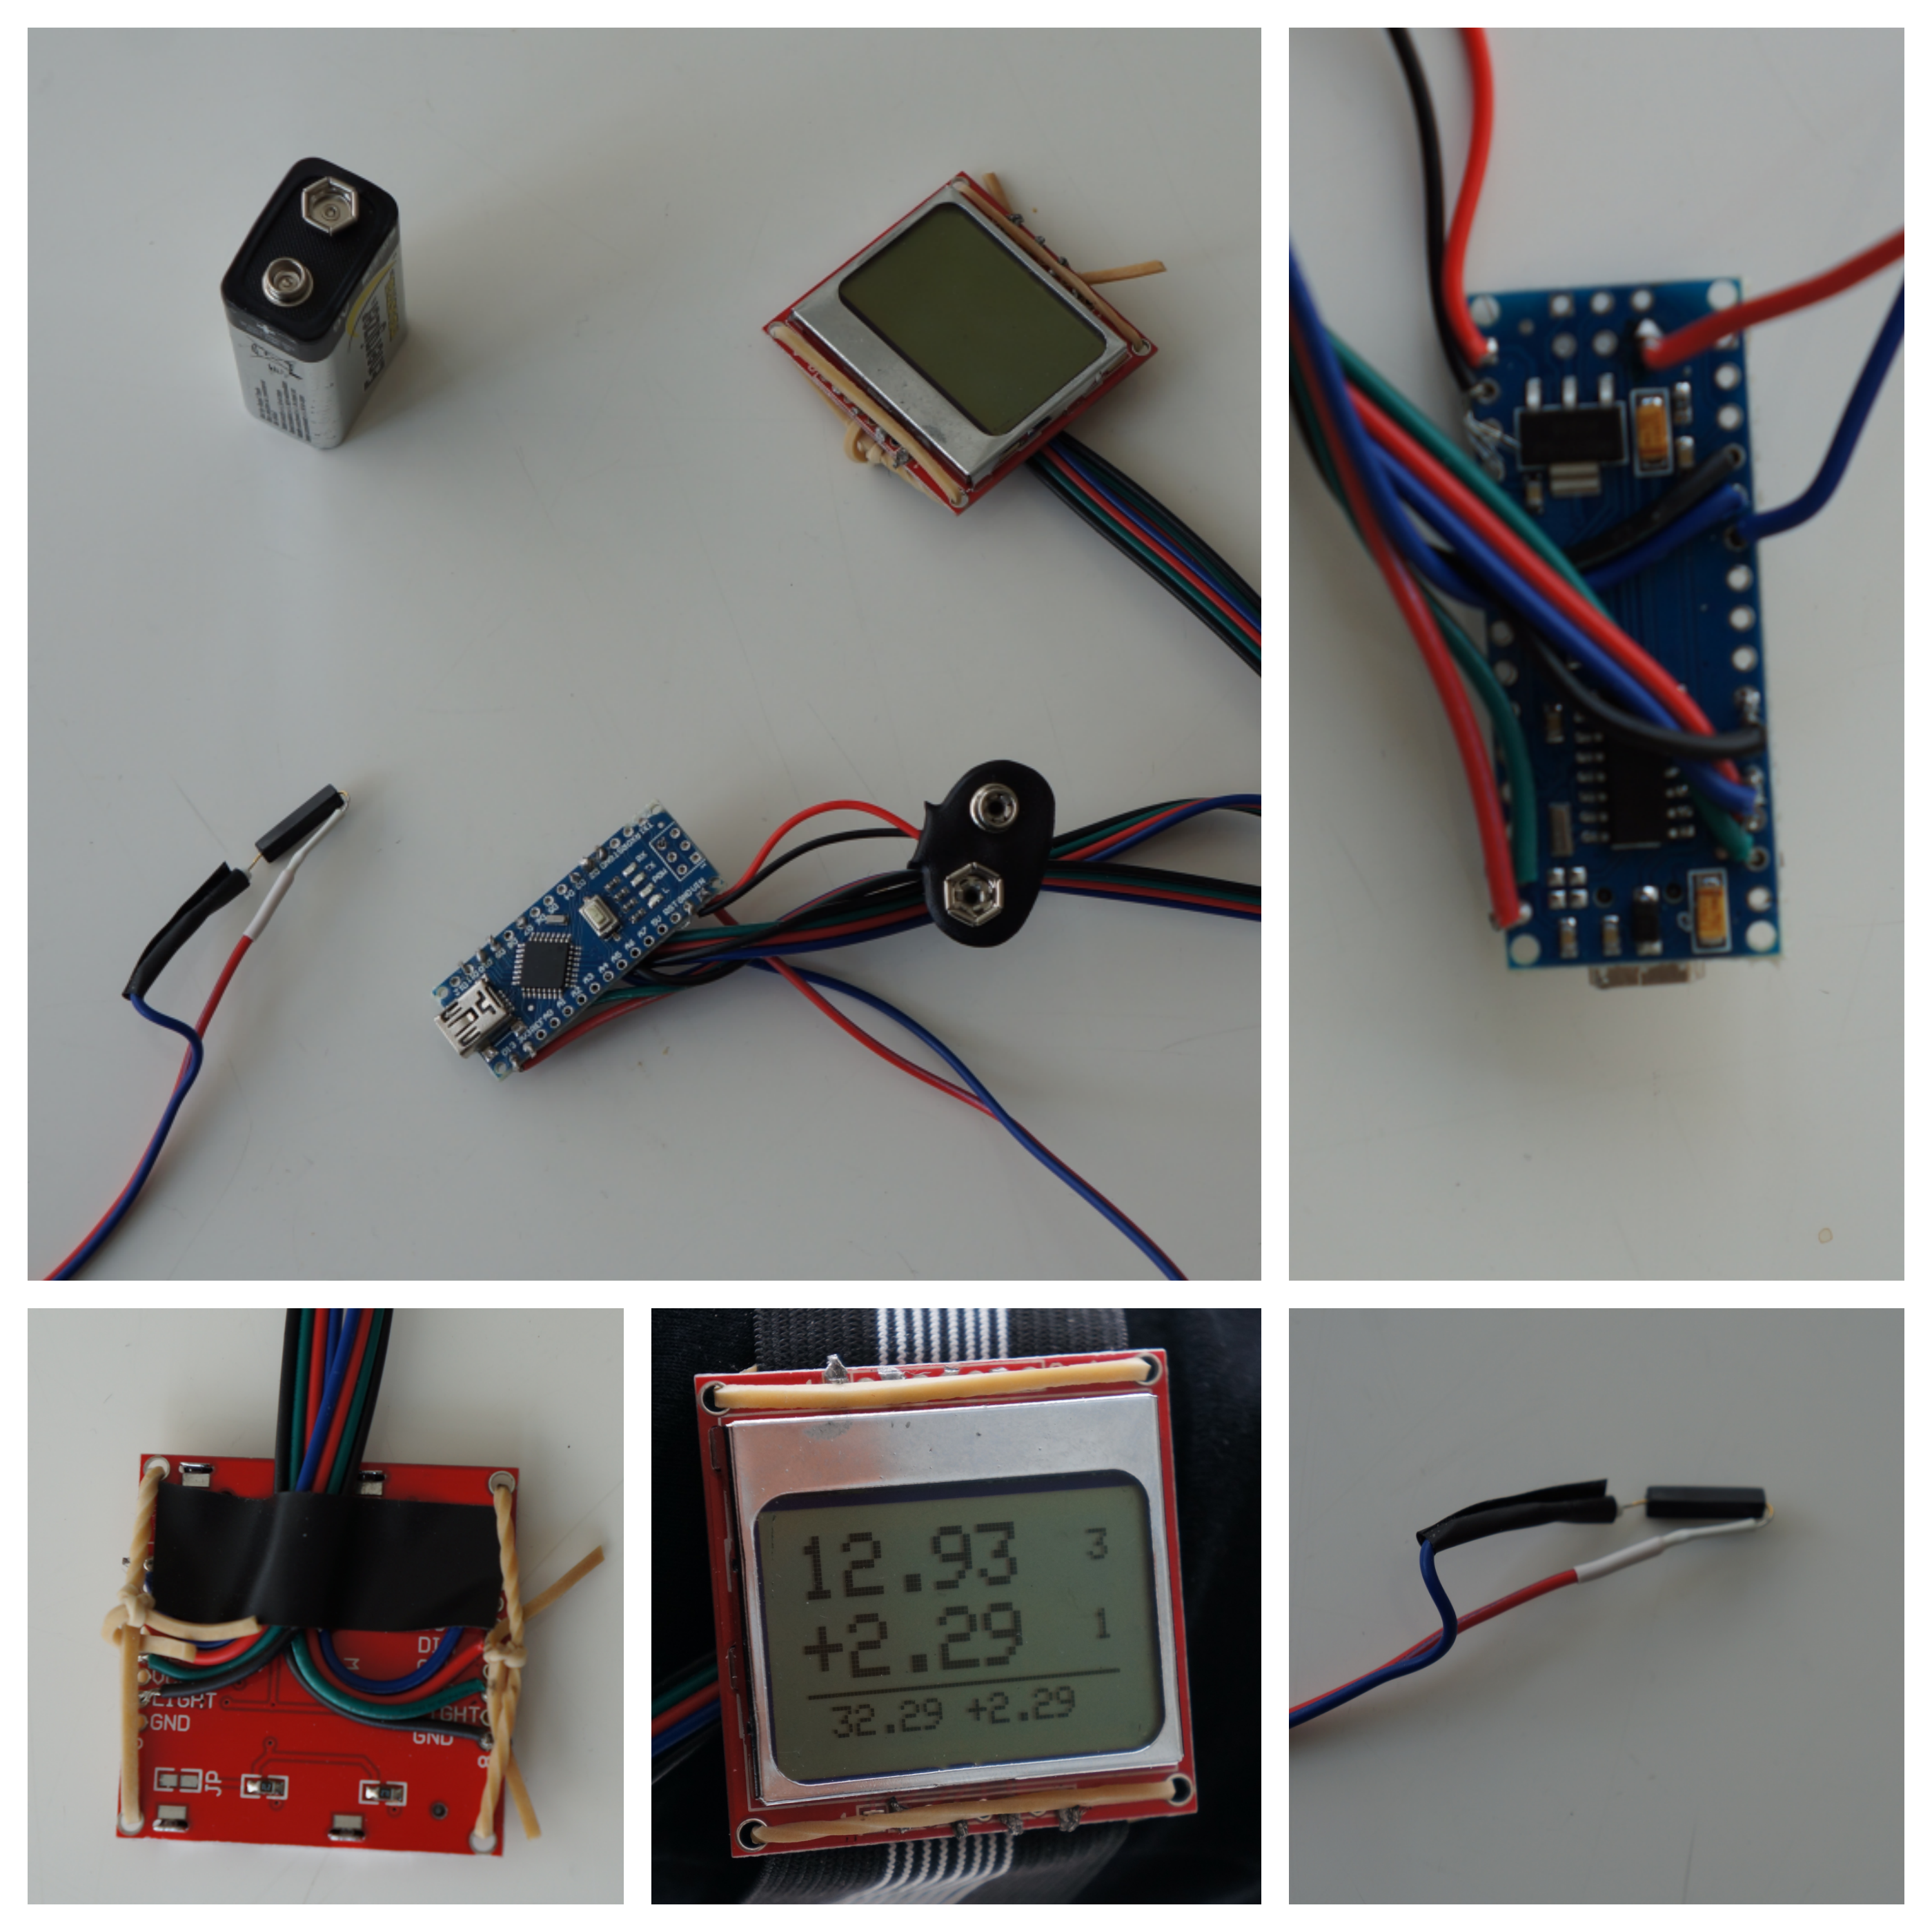
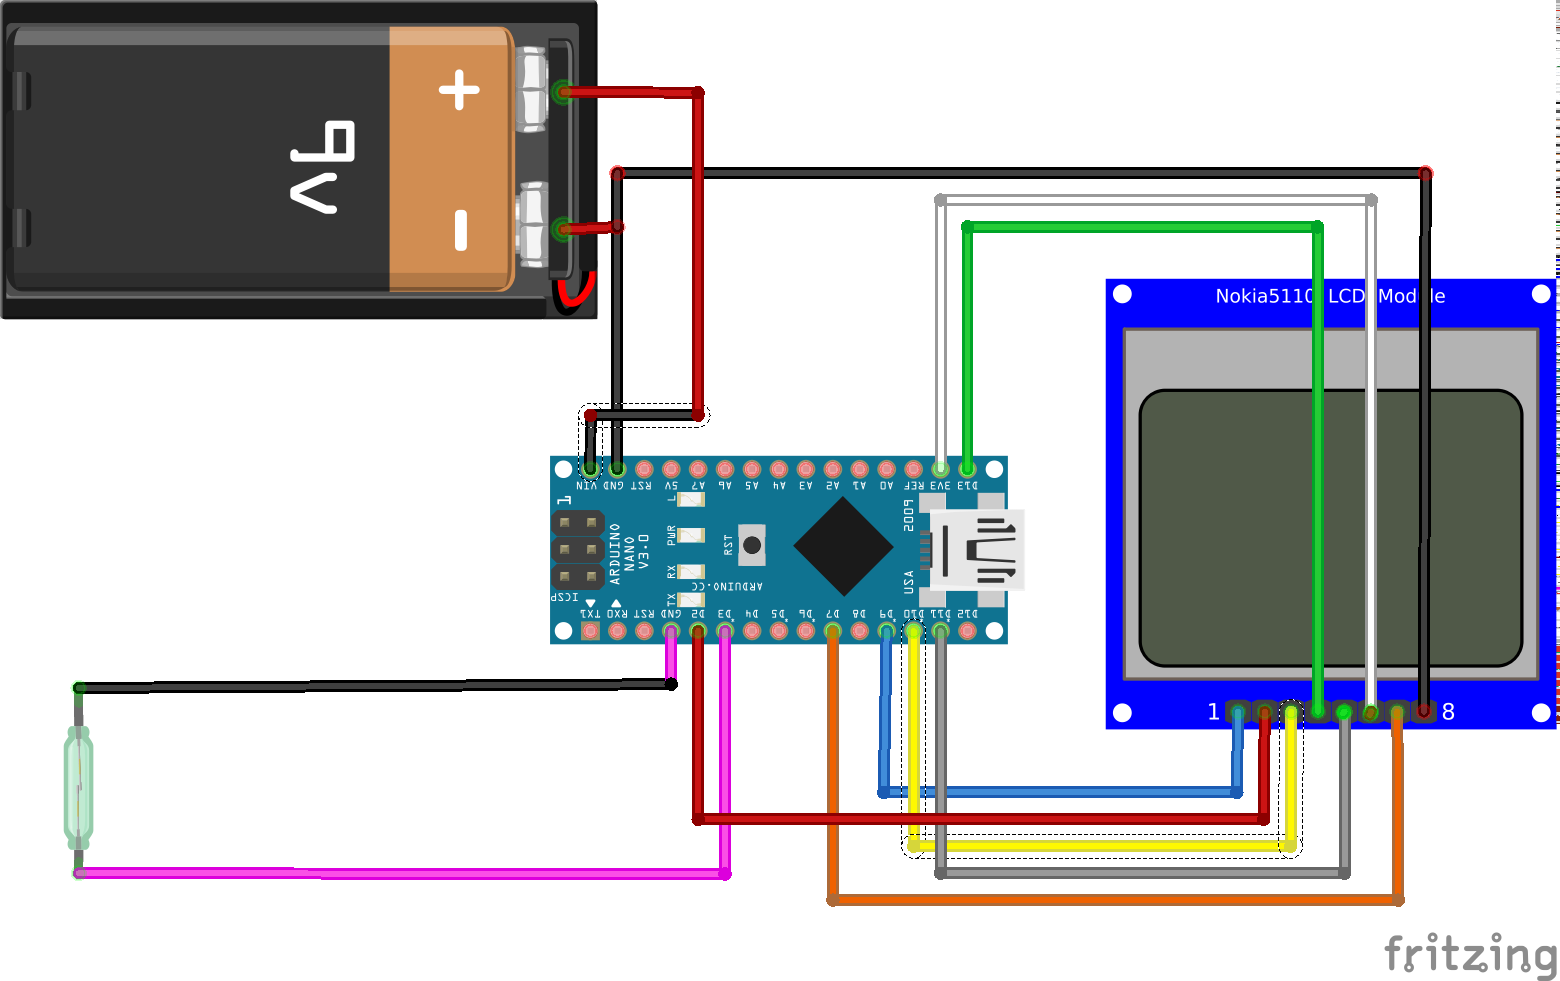
This design splits the arduino and the display. The idea is to be able to have the arduino and the batery in your pocket, and the the display on the arm like a wrist watch. I used an Arduino Nano for the smaller size and a Nokia 5110 display which is cheep and widely used with good libraries avalible. Loosing the keyshield, I have to do a lot of soldering and also I loose the ability to interact with the device as there are no keys. Also instead of a reed module, I use just the reed switch and hope to be able to have it in my shoe, avoiding the problem of mounting the device in the kart.
- Arduino Nano
- Nokia 5110 LCD display
- Reed switch
- Four Conductor RGB Power Wire
- Velcro Pants Strap for Cycling
- 9V Battery and Adapter
The wiring of the display is choosen to make the soldering as easy as possible using two pices of four connector wire, also allowing the use of the backlight (eg to blink for best lap). The display I have allows for using both top and buttom for adding the wires. I have choosen to use every second hole in each row and connect with a four conductor wire to make it easier for my fat fingers to avoid shorts when soldering.
Only configuration options is compiletime, one is MAX_SECTORS which is 3 and determines the number of magnetic strips on the track, and then DEBUG determines if ressources is used on serial output and the value of the the debounce timer.

The primary information on the display is the sector time and the time difference to the best sector time. Below the horizontal line is the rolling laptime (ie the sum of the last three sector times) and the time difference to the best rolling lap time. At the right is the current lapnumber displayed and below that the current sector.
From top left to bottom right:
- dashes means ready to go
- lap and sector set to
1as we pass the start - first sector completed in
9.63 - second sector completed in
14.51 - third sector completed in
10.64making the first laptime34.78as we are passing the start-finish line - first sector completed in
10.49which is0.86slower, that the best first sector, which also impacts the rolling laptime - second sector completed in
8.87which is5.64faster setting a new best second sector and a new best rolling laptime - third sector completed in
12.93which is2.29slower compared to the first time around, completing the second lap in32.29faster that the first full lap, but2.29slower that the fastest rolling lap.
I need some way to interact with the code to set the number of sectors. Either it could be done as going into some kind of configuration mode for a period right after boot, or we could make is autodetect using a compass.